 Loading... Please wait...
Categories
Spinning-Wheel-Maintenance
Spinning Wheel Maintenance
 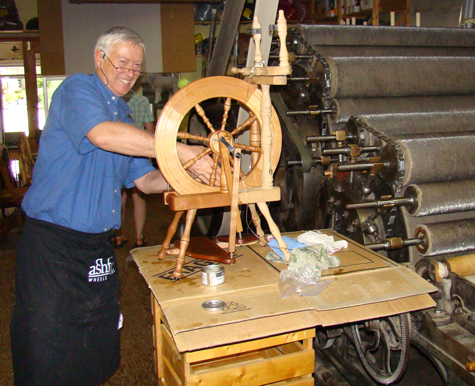 |
So, we hired this guy from New Zealand, but he didn't work out, so we sent him back! Yes, that is Richard Ashford working on our Ashford Wheels at Birkeland Brothers during "The Ashford Way" event on July 28, 2010.
He had this information to share:
- The most important aspect of spinning wheel maintenance is to ensure the 3 main elements of the spinning wheel are free to rotate.
- The 3 main elements of a spinning wheel are: the wheel, the flyer and the bobbin.
- To check these, remove the drive and brake band.
- Oil your spinning wheel with Ashford wheel oil or 30 grade motor oil on all the nylon bearings.
1. The Wheel:
- Spin the wheel. It should rotate freely for 20 plus revolutions on nylon bearings and 100 plus on ball bearings. The ball bearings on an Ashford wheel from 2008 onward are sealed for life and do not need any lubrication.
- If necessary: Prise the wheel supports apart and let the oil drop onto the crank between the hub and the bearings.
- Con rod (pitman) bearing: apply a drop of oil.
- Treadle hinge pins on double treadle wheels: apply a drop of oil to each hinge.
- If the wheel appears to be pinched between the wheel supports, loosen the bolts or screws that are holding the frame. Spin the wheel until it is free, and then gradually retighten the bolts and screws.
- On the Ashford Traveller this can be altered by loosening the 2 bolts holding the wheel supports and moving them until correct.
- Check the con rod (pitman) bearing to ensure it isn't binding as it rotates.
- Check that the gap between the bottom of the con rod (pitman) and the treadle rail is between 1/2 to 3/4 inches (10 to 18 mm). If greater than this it can cause you ankle strain, and if too close the two can bind, thus stretching the joint. If necessary, replace the joint.
2. The Flyer:
- Spin the flyer. It should rotate freely.
- If necessary: Check and lubricate the flyer bearings.
- Ensure the flyer bearings are at right angles to the flyer shaft. If not, loosen the screws holding the maid upright, realign and tighten.
- Check there is approximately 1/8" (2 to 3 mm) end float between the flyer, bobbin and flyer bearings.
- If the wheel has been factory finished, check there isn't any lacquer on the spindle or bobbin bearings.
- Check the alignment of the wheel and the flyer whorl. If necessary, loosen the screws holding the maiden bar, realign and tighten.
- If the drive band is worn, replace with a medium soft cotton cord, or a polycord from Ashford.
3. The Bobbin:
- Spin the bobbin. It should rotate freely.
- If necessary, lubricate the bobbin bearings with a drop of oil.
- Ream the bearings with 1/4" (6.25 mm) round fine chain saw or fine sandpaper wrapped around a pencil.
- Check there is sufficient clearance between the bobbin and flyer.
- On double drive wheels the flyer whorls have "V" grooves. The bobbin whorl is smaller and "U" shaped. This difference enables the wheel to drive the flyer at a constant speed and allows the bobbin to accelerate or slow down when drafting. Check the bobbin whorl is smooth and "U" shaped.
Enjoy your wheel and happy spinning!
Click here to purchase Spinning Accessories.
Click here to purchase fibres for spinning.
All prices are in CAD.
Copyright 2026 Birkeland Bros. Wool.
Sitemap |
Birkeland Bros Wool operates on the unceded traditional territories of the Stó:lō people, the Semá:th and Mathxwí First Nation.
![]()
![]()